- Colection of 65 PHP scripts for $4.29 each
How to Create Animated Gif Images
Tuesday, 2nd July, 2013 /
Miscellaneous Tutorials / 4 Comments
Here is a tutorial to show you off how to create a GIF image in Photoshop. Also, at the end we will suggest you a few simple web tools for creating animated GIFs.
For the purpose of this tutorial we will walk you through creating a GIF image using the 5 images below.


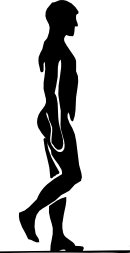
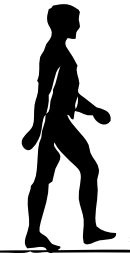

 The Walking Man We Have Created
CREATE GIFs IN PHOTOSHOP
To create our walking man we will animate layer content in Timeline mode using the 5 images. Further down is step by step tutorial how to do it yourself. The first step is to load all the five images in Photoshop as separate layers. Keep reading to see how.
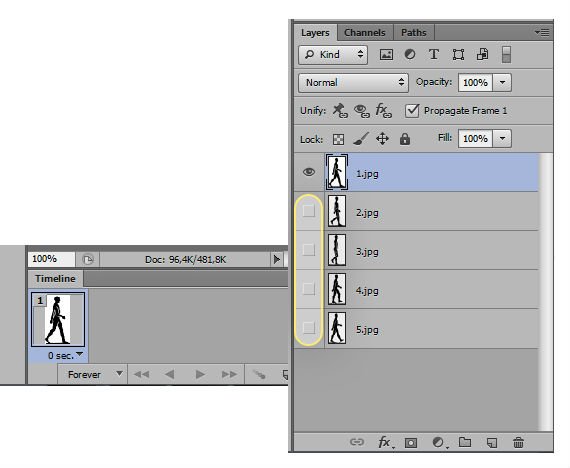
ORGANIZE IMAGES INTO LAYERS
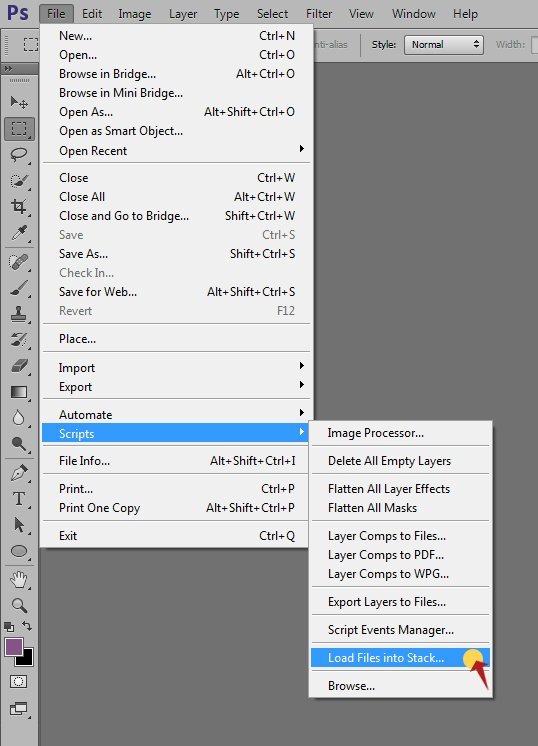
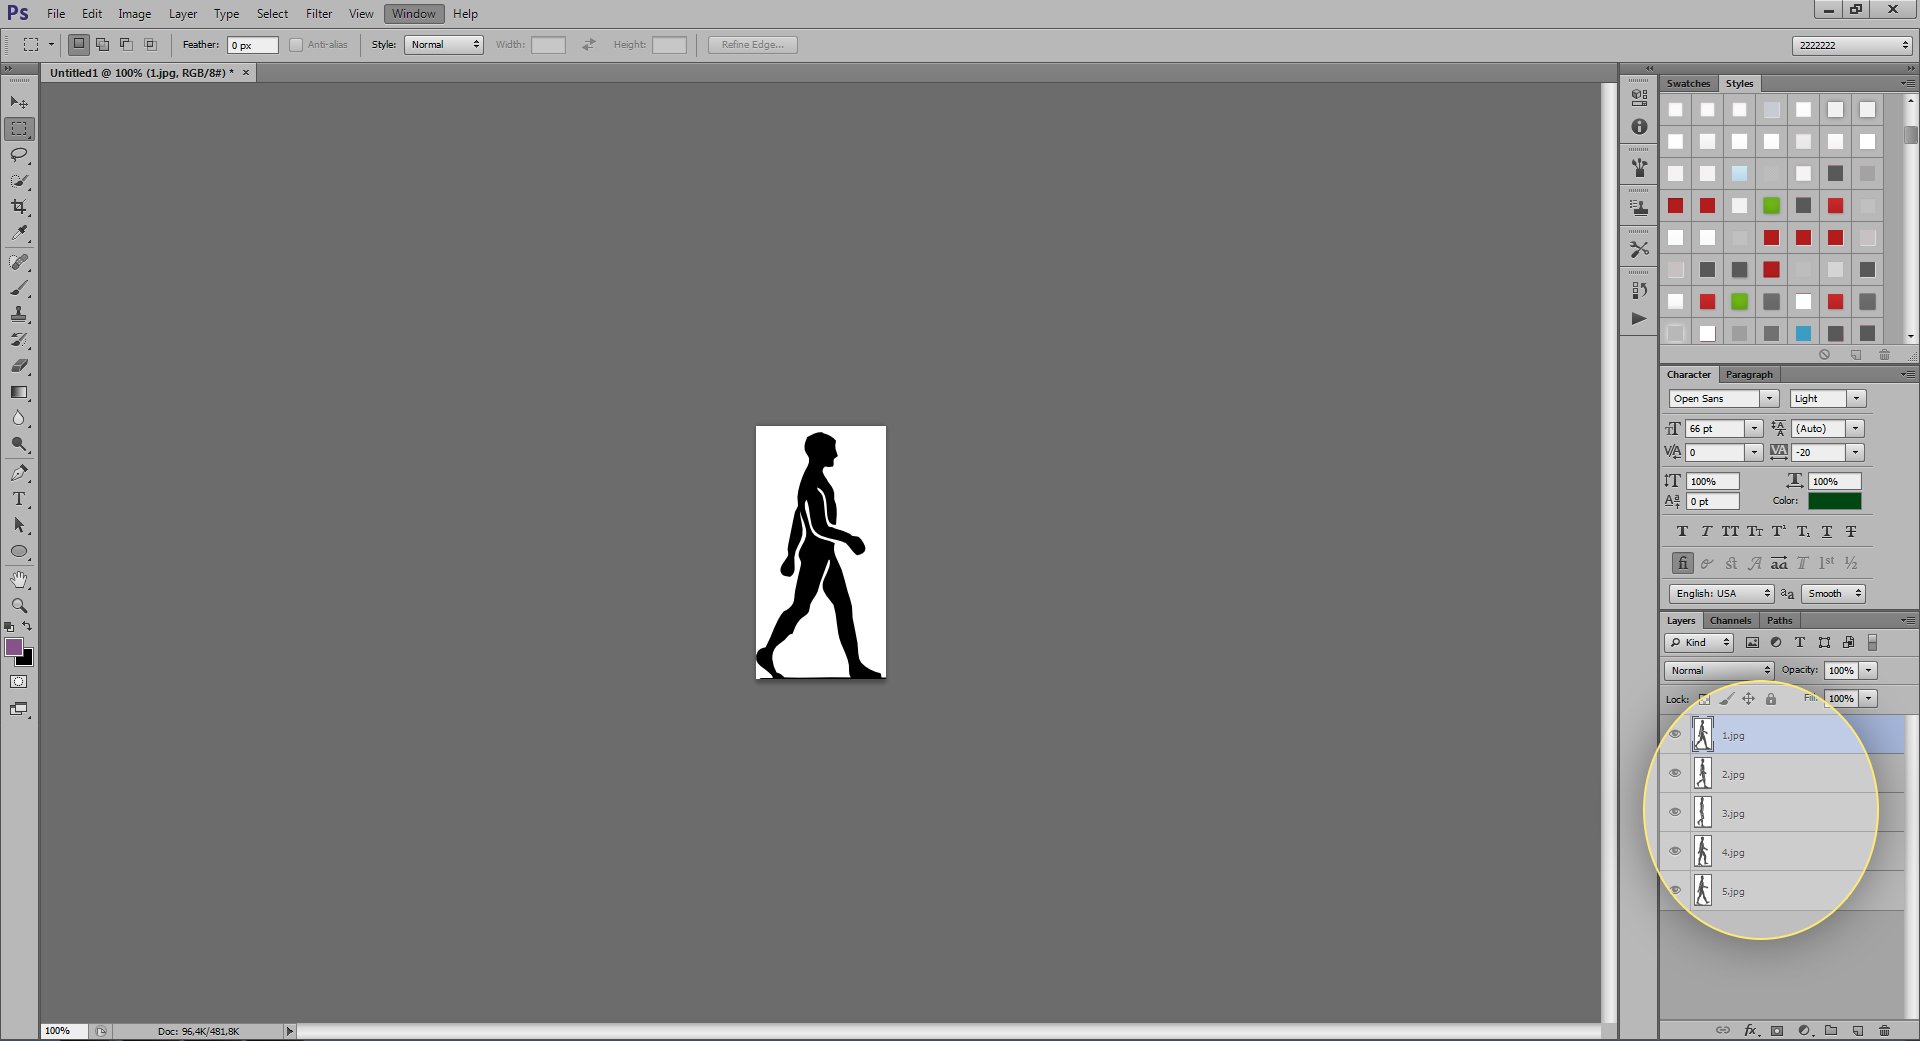
The first thing you need is to organize your images into layers. Open the File menu, choose Scripts and then Load Files into Stack. Then find the images in your computers and click OK.
This will open all images as multiple layers.
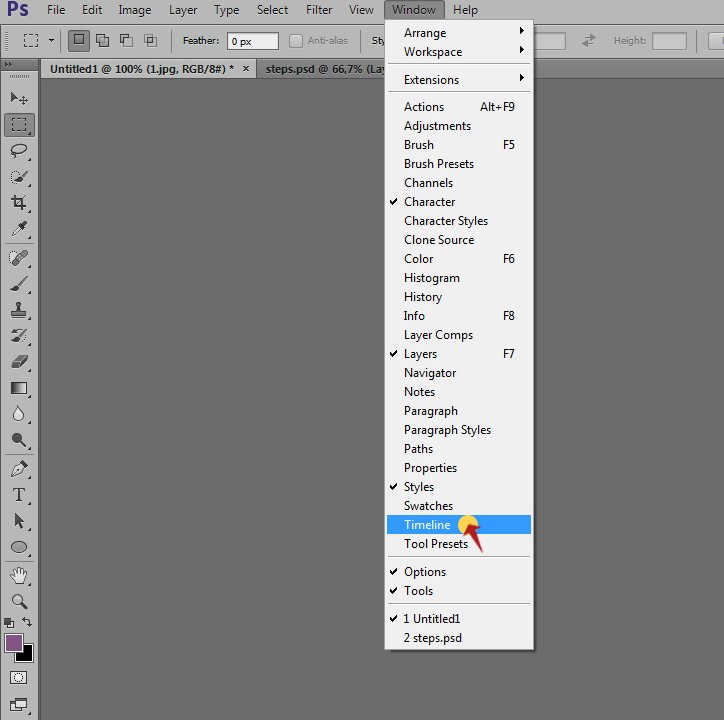
ANIMATE LAYER CONTENT IN TIMELINE MODE
From the Window menu choose Timeline to open the Timeline panel (Animation panel in Photoshop Extended CS5). The Timeline panel will display each layer. Through the Timeline you can manipulate the frame duration and animation properties for layers and is also synchronized with the Layers panel.
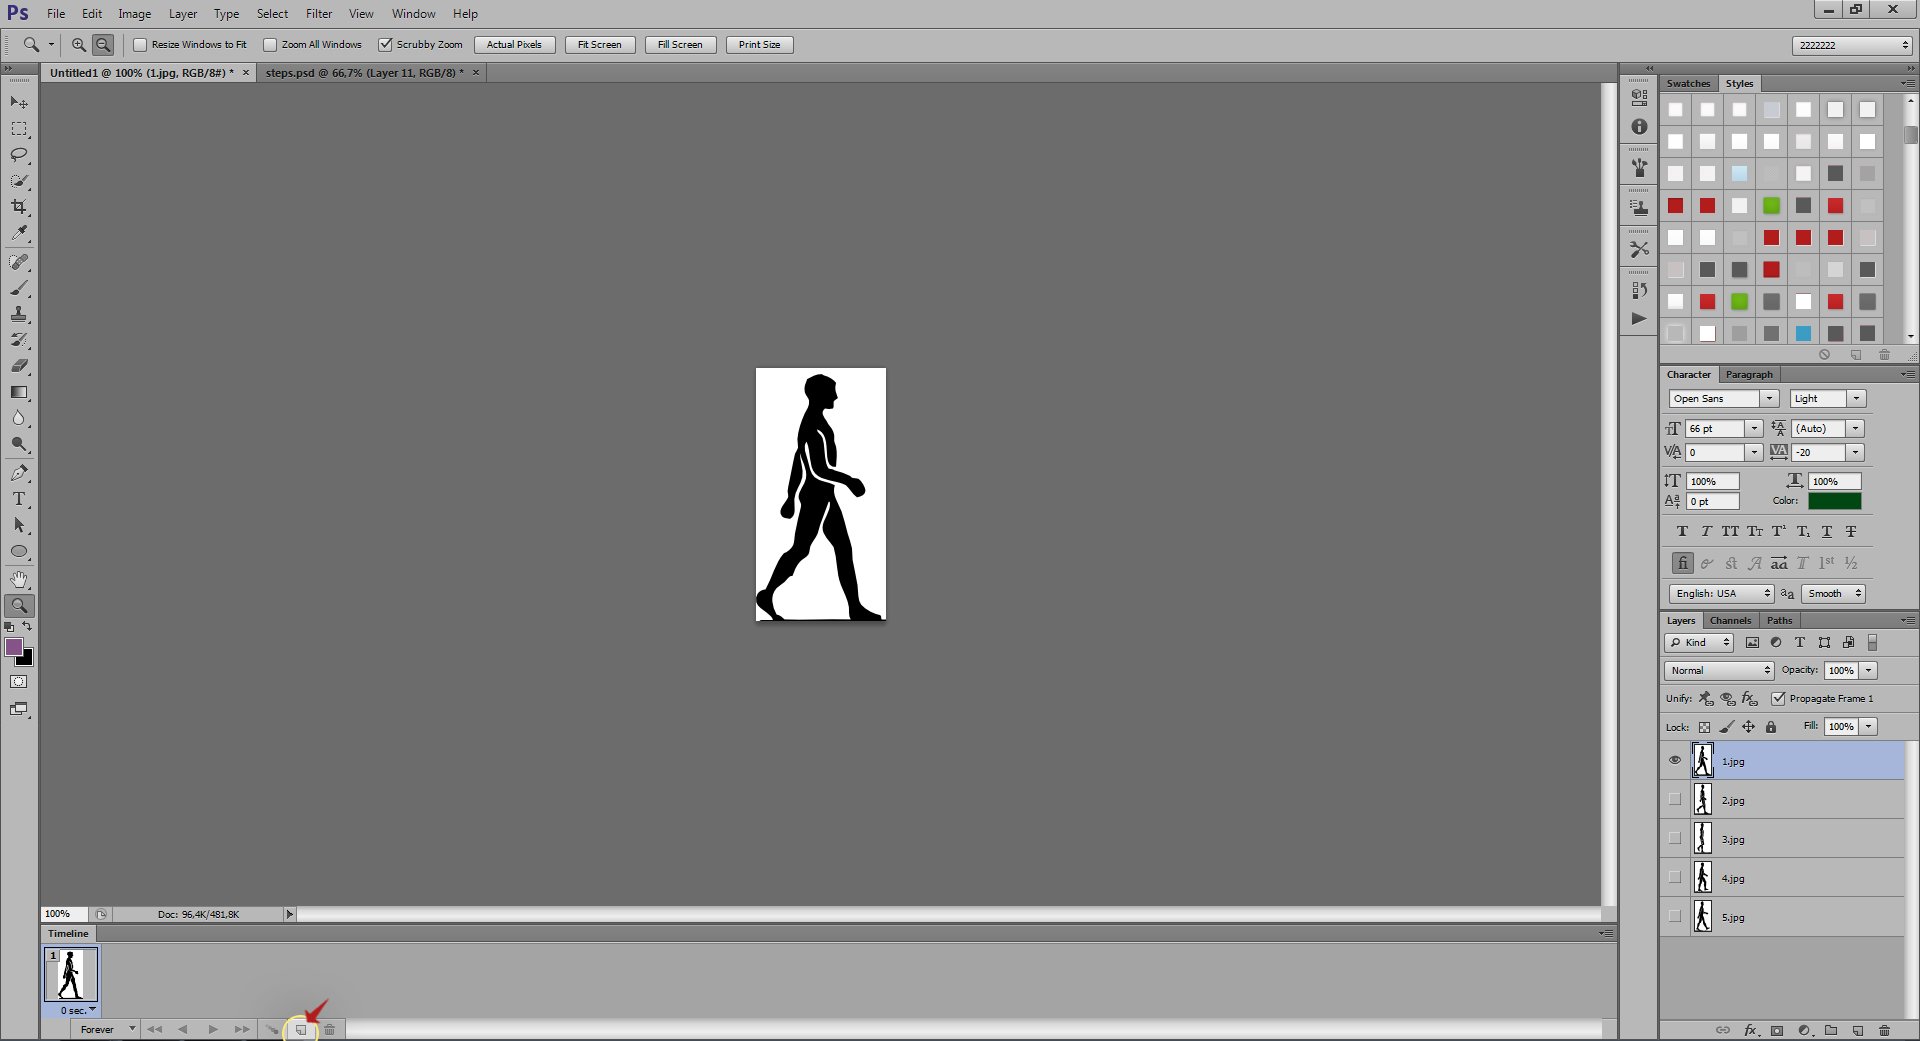
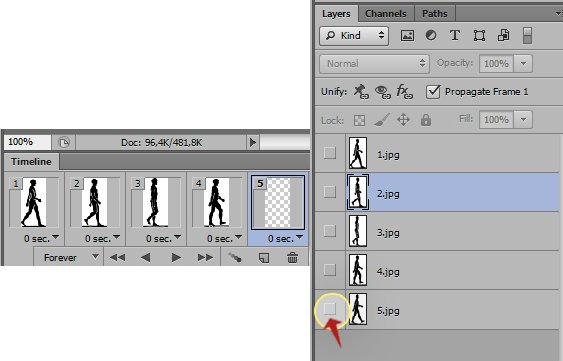
Be sure to change the layer visibility in frames. Leave the Image 1 in the first frame, the Image 2 in the second frame...etc.
Use the icon on the lower-right corner of the panel to add new frame. This will copy the selected frame in the Timeline panel altogether with layer properties and configuration. Be sure to change the visibility of layers in each frame.
Make sure to change the layer visibility for each frame you create.
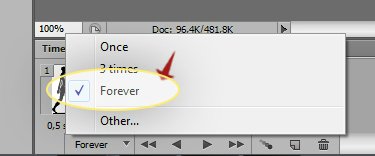
SET THE ANIMATION SPEED
Once you have all frames set up, choose the down arrow triangle under the first frame to set the delay between the first and the second frame.
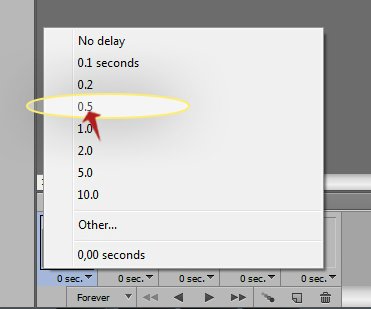
You can either apply this setting to all frames – use the 'Shift' key to select multiple frames, or chose the first icon from the left in the Timeline panel and select the 'Forever'.
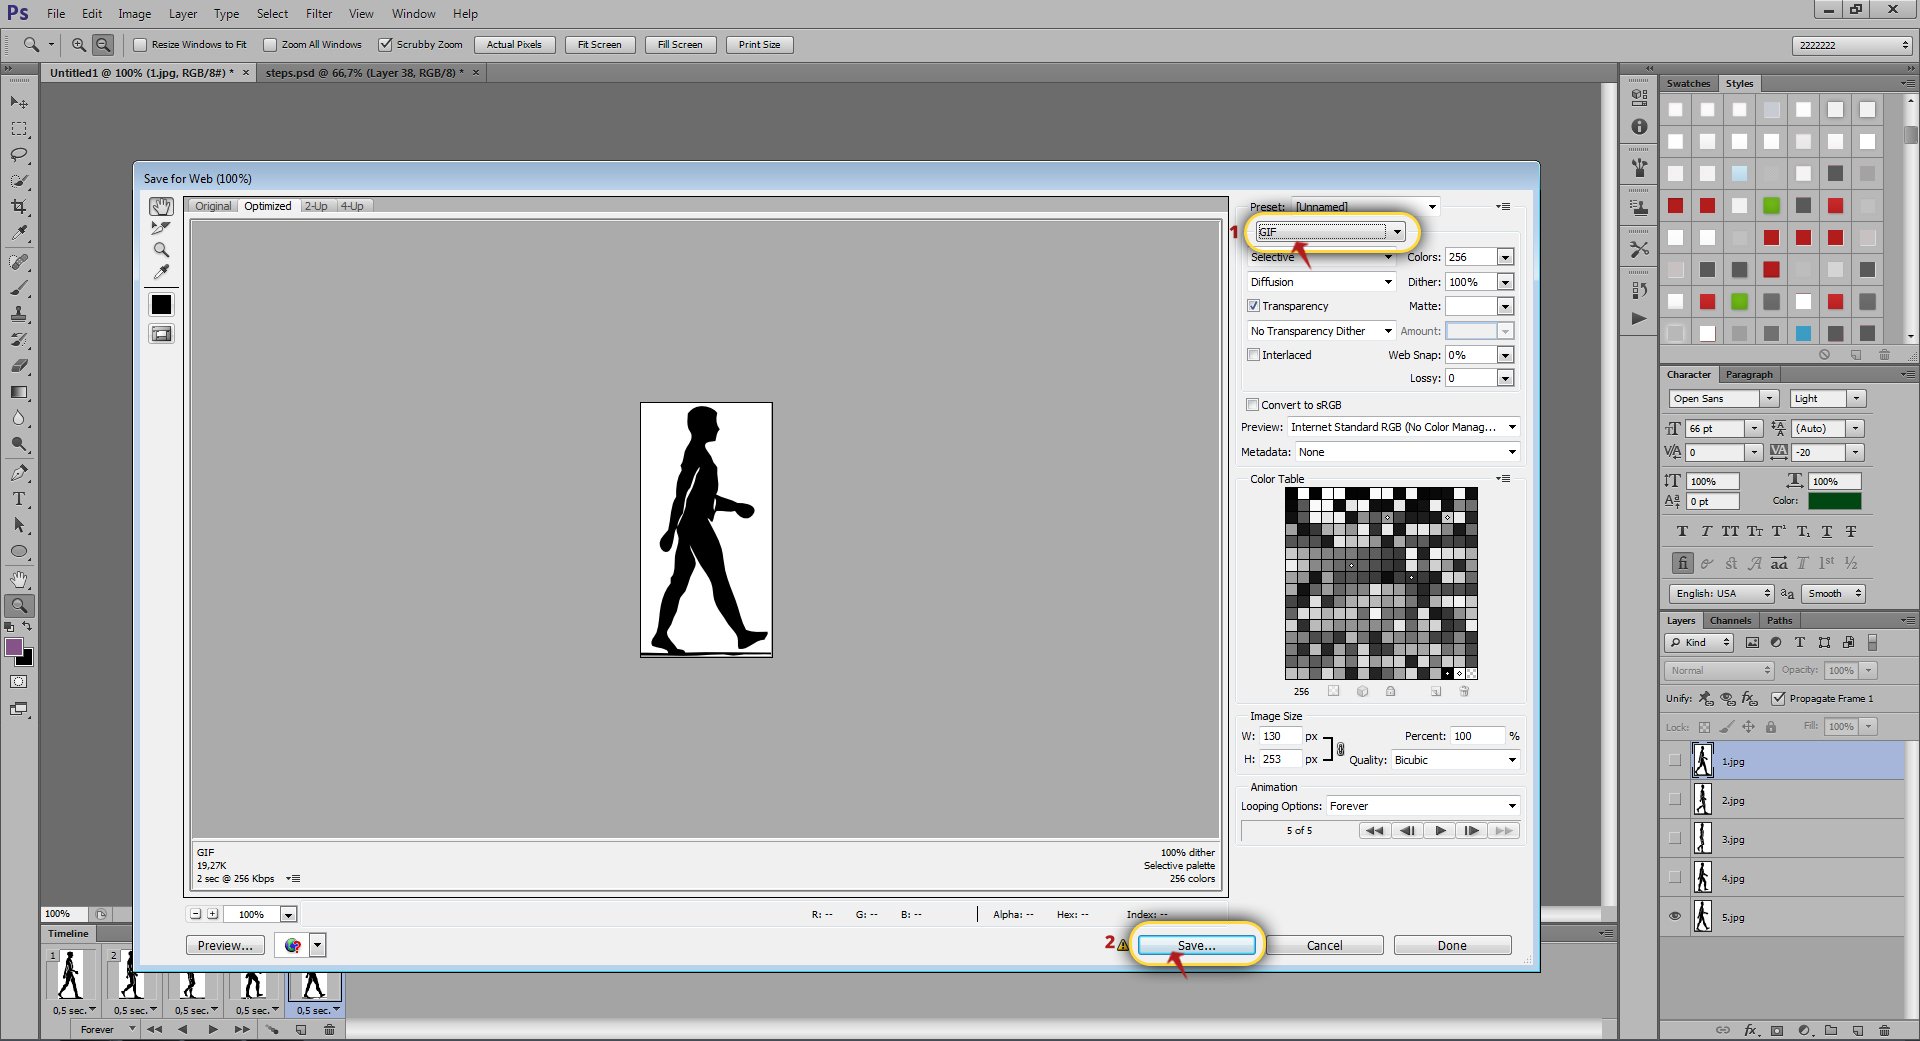
SAVE THE ANIMATION FOR THE WEB
Use the controls in the Timeline panel (CS6) to preview the animation. Once you are satisfied with your work, export your animation as a GIF file. Click on the File menu, then Save for Web. Select to save your file as a GIF and click Save.
ONLINE GIF MAKERS
Another even easier way to create animated images is by using the numerous web based tools, available on the Internet. Not only some of them are free but are very easy to work with. Further down are 3 web based GIF makers that can save you a lot of time and are free and easy to use.
1. GIFMAKER.ME
GIFmaker.Me allows you to create animated GIFs using multiple images. In less than 3 steps you will have your animation done.
First you need to select multiple consecutive images in JPG, PNG or GIF format. Then set up canvas size, animation speed, even add YouTube music URL. Create and download your GIF.
2. MAKEAGIF
With MakeAGif you can also create animated images for free and pretty easy. The toll will walk you through 3 screens to set up your animation. You should be careful, because the tool does not give you the option to preview the animation before you create it. Also the images are branded with the MakeAGif logo.
Here is our walking man created with MakeAGif - http://makeagif.com/i/HNc5gh
3. IMGFLIP GIF GENERATOR
The great thing about ImgFlip is that you can create animated GIF images from a YouTube video or upload a video file from your computer. The tool requires the latest Java installed. A single settings screen allows you to change settings while previewing your work.
The walking man we created with ImgFlip - http://imgflip.com/i/26lbu
Thank you for reading this tutorial. I hope you enjoyed! Please leave your comments below.
For the purpose of this tutorial we will walk you through creating a GIF image using the 5 images below.
The Walking Man We Have Created CREATE GIFs IN PHOTOSHOP
To create our walking man we will animate layer content in Timeline mode using the 5 images. Further down is step by step tutorial how to do it yourself. The first step is to load all the five images in Photoshop as separate layers. Keep reading to see how.
ORGANIZE IMAGES INTO LAYERS
The first thing you need is to organize your images into layers. Open the File menu, choose Scripts and then Load Files into Stack. Then find the images in your computers and click OK.
This will open all images as multiple layers.
ANIMATE LAYER CONTENT IN TIMELINE MODE
From the Window menu choose Timeline to open the Timeline panel (Animation panel in Photoshop Extended CS5). The Timeline panel will display each layer. Through the Timeline you can manipulate the frame duration and animation properties for layers and is also synchronized with the Layers panel.
Be sure to change the layer visibility in frames. Leave the Image 1 in the first frame, the Image 2 in the second frame...etc.
Use the icon
Make sure to change the layer visibility for each frame you create.
SET THE ANIMATION SPEED
Once you have all frames set up, choose the down arrow triangle under the first frame to set the delay between the first and the second frame.
You can either apply this setting to all frames – use the 'Shift' key to select multiple frames, or chose the first icon from the left in the Timeline panel and select the 'Forever'.
SAVE THE ANIMATION FOR THE WEB
Use the controls in the Timeline panel (CS6) to preview the animation. Once you are satisfied with your work, export your animation as a GIF file. Click on the File menu, then Save for Web. Select to save your file as a GIF and click Save.
ONLINE GIF MAKERS
Another even easier way to create animated images is by using the numerous web based tools, available on the Internet. Not only some of them are free but are very easy to work with. Further down are 3 web based GIF makers that can save you a lot of time and are free and easy to use.
1. GIFMAKER.ME
GIFmaker.Me allows you to create animated GIFs using multiple images. In less than 3 steps you will have your animation done.
First you need to select multiple consecutive images in JPG, PNG or GIF format. Then set up canvas size, animation speed, even add YouTube music URL. Create and download your GIF.
2. MAKEAGIF
With MakeAGif you can also create animated images for free and pretty easy. The toll will walk you through 3 screens to set up your animation. You should be careful, because the tool does not give you the option to preview the animation before you create it. Also the images are branded with the MakeAGif logo.
Here is our walking man created with MakeAGif - http://makeagif.com/i/HNc5gh
3. IMGFLIP GIF GENERATOR
The great thing about ImgFlip is that you can create animated GIF images from a YouTube video or upload a video file from your computer. The tool requires the latest Java installed. A single settings screen allows you to change settings while previewing your work.
The walking man we created with ImgFlip - http://imgflip.com/i/26lbu
Thank you for reading this tutorial. I hope you enjoyed! Please leave your comments below.
4 Comments to "How to Create Animated Gif Images"
More Free Resources
Check our extensive collection of top-notch PHP Scripts that will enhance your website!

Free Web Templates
Browse our FREE Website Templates and use them to create your new sweeping website!